On to the project.
Every year, I am in charge of the decor for a themed "Silent Weekend." Interpreting students spend the weekend at a retreat center using ASL instead of their voices to communicate. This year's theme was "Harry Potter." I know, poor me. I had to re-watch all the HP movies and make the cool stuff for my very own. I'll try not to cry on my keyboard re-living it.
The Monster Book of Monsters!
A cheap, big book like an old encyclopedia from your neighborhood thrift store
Fake fur (amount depends on book size of course, but we used about 1/3 yd per book)
Large googly eyes
Red felt scraps
Cheapo plastic vampire teeth (most party stores have them year round in the party favor section)
Hot glue
Cut the fur so that you have at least 3" of fabric around each edge of the open book. (Don't worry, you will trim later.)
Trace the spine of your book with a marker in the center of your fabric, and liberally fill the rectangle with hot glue. Immediately squish the spine into all that finger-blistering goo and hold it until the glue dries. (C'mon. It doesn't take that long.)
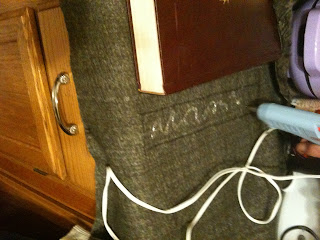
Sorry about the fuzzy picture (ha!). Use your scissors to snip triangles around the edges, leaving about 3" untrimmed in the center (see below).
They shouldn't be even. Remember you can always trim them later, but adding on is difficult.
Those center flaps I told you not to cut? Flip the top flap (say that 10 times fast) under the cover and glue it down.
Fold the "furry teeth" over both ends of the spine and glue those down, too.
Cut out a forked tongue from your red felt approx. 1.5" x 5". Give yourself some leeway to play with lengths and shapes. I used a sharpie to give it a little definition.
Flip to the middle of your book and glue it in.
Still have that red felt hanging around? Good. Cut those flimsy plastic teeth at the hinges, and trim them as close to the fangs as possible so they will lay relatively flat. You can use scissors, they are that cheaply made. But seriously, why are there three teeth between the fangs?
Cut a vague, wobbly mouth shape out of felt and glue it to the back of your teeth. Your plastic monster teeth. That are not in your mouth. No lawsuits.
Flip the bottom fur flap up and glue it to the first page to secure the pages together. This will make your "Monster" more sturdy. (You're still saying "flip the fur flap," aren't you?)
Glue your monster mouth to the fur flap and fluff the fur around it to obscure the felt edges.
We are almost done, I promise!Cut a 3"x7" strip from your scrap fur. This will be his uni-brow. Fold one side over 1" and glue. Glue it to the top of your book, bowed up slightly in the center. Again, fluff the fur to hide your edges.
If you'd like, you can glue your googly eyes to pieces of brown felt before attaching to the book. Whatever you decide, arrange the eyes under the uni-brow and glue.
This goes faster if you have a furry assistant, I promise. Trim your fur teeth to your liking, preferably with the pages showing through occasionally so you can tell it is a book.
Add a brown kid's belt to keep it from biting your fingers!
Always Grateful,
Katie


No comments:
Post a Comment