Wednesday, February 29, 2012

Cheater, cheater, pierogi eater!

I have been slacking in the blog department this month, but I haven't been slacking in the craftiness!

The Bug has excellent taste in music, especially for a six year old. Last year, we built a queen sized loft bed for him, and we are still putting the finishing touches on it.  Bug has requested a "Beatles: Yellow Submarine" theme and I will do anything to avoid Power Ranges decor... So I painted this on his bed:
We will be putting family member's pictures in each of the port holes. I love that kid.

On to the food...

No one can accuse this recipe of being healthy. It can be called easy-peasy and tasty. I give you...

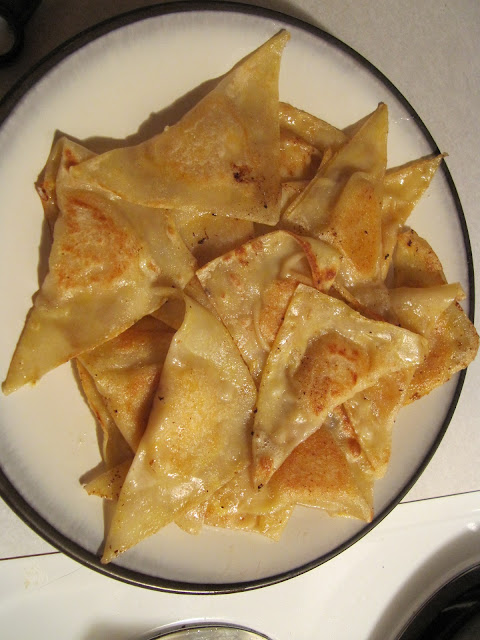
Cheater Pierogi!

Why "cheater?" Sometimes (well... most times), I don't want to make pasta dough for my homemade ravioli or pierogi. I might not want to take the extra 30 min to make real mashed potatoes. The extra steps make the eating part so much further away! I want my potato-y goodness ASAP!

Sometimes I'm just lazy.


What you'll need:
Instant mashed potatoes or 2c leftover mashed potatoes.
Won Ton wrappers
1/2c finely shredded cheddar cheese
1/2 medium onion, finely chopped
1/4c salted butter-- (just have it on hand, you will probably use much less)
1 egg

Prep "2 servings" of instant mashed potatoes and set aside.


Infomercial moment:
"Do you hate it when chopping onions brings tears to your eyes? You're not alone! Simply light a 'Cry-no-more' anti-onion candle and you'll be crying invisible non-burning tears of joy!"

But seriously- light a candle, it works.

Saute' the onions in a few tablespoons of butter until they are translucent and a little brown. Butter sauteed onions create one of my favorite smells. Not everyone in my house shares that sentiment.
So, because the guys in the house think they don't like onions, when they are fully cooked, I puree them and hide them in the mashed potatoes.  Sometimes moms have to be sly. Mix the cheese into the mashed potatoes, and the filling is ready.

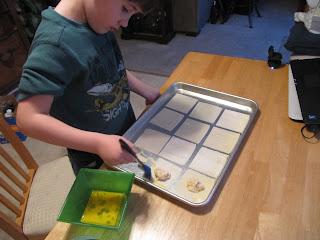
Have your helper arrange wonton wrappers on a cookie sheet or cutting board.
*TIP: Keep wrappers covered until you are ready to use them, they dry out quickly.
Scoop a tablespoon of filling into the center of each wrapper and brush egg around the edges.
Fold the wrappers in half to form a triangle and press out any air bubbles. Be sure all your edges are tightly sealed, or they will open up during the next step.
This looks like double the work, but each step is important.  Bring a large pot of water to boil, and drop 3-4 pierogi in at a time. If you skip the boiling step, the wrappers will be too dry and crunchy. Everyone hates a crunchy pierogi.

*TIP: Add 2 T of oil to the water to prevent pierogi from sticking together.

After boiling for 2-3 minutes the pierogi will begin to float. The pierogi are fully cooked at this point, but soft and noodle-like. Scoop them out of the water and brown them in a skillet over medium heat.


Serve warm with sour cream or ketchup.  So good, and they never noticed the onions!

Sunday, January 29, 2012

Freezer paper stencils- Doctor Who

Hello Sweetie!

I was introduced to freezer paper stencils a few years ago by my dear friend, and it has since been my go to trick for shirt embellishment. Most of those shirts have been for the kiddo. It's about time Mama had some fun, right?

For this project you will need:
Freezer paper (found in the grocery store near the foil. This is NOT the same as waxed paper!)
An Iron
Fabric paint (I used metallic)
Scissors or an exacto knife
Plain canvas tote bag (available at the craft store in various sizes)

That's right, kids. Whovian tote bags. I will pause for a moment while you take in the splendid geekiness.

"But I couldn't paint a straight line with a Dalek exterminator gun pointed at my head!" you say.  Fear not, freezer paper is here to save the day.


I drew the fez, bow-tie, and Tardis outline myself, but any silhouette you can find and print off the Internet will work. Remember- you are going to have to cut this out eventually so the more simple the design, the better. Tape your design to a sunny window and the freezer paper over it, shiny side toward the glass.  Put your pencil and tracing skills to work!

I used simple lines for my design so I was able to use scissors instead of an exacto knife to cut out my design. For the negative spaces (white lines and boxes) for the Tardis I used a ruler to draw straight lines and cut strips of freezer paper.

 With your iron on the cotton setting and no steam, press the stencil onto the bag shiny side down.


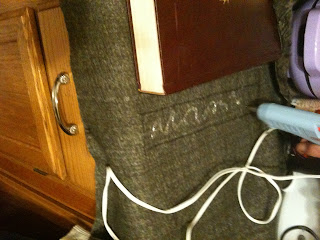
At this point, my camera battery died, and I had to start using my phone. Imagine you saw me paint this:
Did you imagine I used a sponge brush to dab (not wipe) the paint over the stencil? Wow. You ARE good. Dabbing the paint straight down is important in case your ironing job wasn't as thorough as you thought it was, leaving gaps that paint can sneak under to ruin your beautiful, straight lines. Sneaky, paint is.

Once your paint is dry, simply pull your stencil off! I use a straight pin to start my peel, in case the paint isn't as dry as it seems. I'm telling you- sneaky. I chose not to add any more detail to the Tardis, but the fez is a different story.


What would a fez be without a tassel, anyway?

An upside-down flower pot on your head.

That was meant to be rhetorical.

Let's take a closer look at the finished products, shall we?


I wear a tote bag now. Tote bags are cool.


-Katie

Friday, January 27, 2012

Monster Book of Monsters- Tutorial

I am so very proud of myself. Today I managed to donate 6 trash bags of clothing to the thrift store and only bought one grocery bag full of stuff. My ratio is improving. I think this blog may actually prevent me from becoming a fabric and "stuff I plan to re-purpose" hoarder, as I am actually working on all those projects I've had sitting around.

On to the project.
Every year, I am in charge of the decor for a themed "Silent Weekend."  Interpreting students spend the weekend at a retreat center using ASL instead of their voices to communicate. This year's theme was "Harry Potter." I know, poor me. I had to re-watch all the HP movies and make the cool stuff for my very own. I'll try not to cry on my keyboard re-living it.

The Monster Book of Monsters!

What you'll need:
A cheap, big book like an old encyclopedia from your neighborhood thrift store
Fake fur (amount depends on book size of course, but we used about 1/3 yd per book)
Large googly eyes
Red felt scraps
Cheapo plastic vampire teeth (most party stores have them year round in the party favor section)
Hot glue

Cut the fur so that you have at least 3" of fabric around each edge of the open book. (Don't worry, you will trim later.)


Trace the spine of your book with a marker in the center of your fabric, and liberally fill the rectangle with hot glue. Immediately squish the spine into all that finger-blistering goo and hold it until the glue dries. (C'mon. It doesn't take that long.)

If you are using low-temp glue you'll have to work quickly to get enough coverage on the book covers before your glue dries. I used high-temp, but you low-temp gals (that's not an insult) should glue the middle first, press on the fur, then lift your fabric a bit to glue around the edges.

Sorry about the fuzzy picture (ha!). Use your scissors to snip triangles around the edges, leaving about 3" untrimmed in the center (see below).
They shouldn't be even. Remember you can always trim them later, but adding on is difficult.

Those center flaps I told you not to cut? Flip the top flap (say that 10 times fast) under the cover and glue it down.
Fold the "furry teeth" over both ends of the spine and glue those down, too.


Cut out a forked tongue from your red felt approx. 1.5" x 5". Give yourself some leeway to play with lengths and shapes.  I used a sharpie to give it a little definition.
Flip to the middle of your book and glue it in.
Still have that red felt hanging around? Good.  Cut those flimsy plastic teeth at the hinges, and trim them as close to the fangs as possible so they will lay relatively flat. You can use scissors, they are that cheaply made.  But seriously, why are there three teeth between the fangs? 
Cut a vague, wobbly mouth shape out of felt and glue it to the back of your teeth. Your plastic monster teeth. That are not in your mouth. No lawsuits.


Flip the bottom fur flap up and glue it to the first page to secure the pages together. This will make your "Monster" more sturdy. (You're still saying "flip the fur flap," aren't you?)
Glue your monster mouth to the fur flap and fluff the fur around it to obscure the felt edges.
We are almost done, I promise!

Cut a 3"x7" strip from your scrap fur.  This will be his uni-brow. Fold one side over 1" and glue. Glue it to the top of your book, bowed up slightly in the center. Again, fluff the fur to hide your edges.

If you'd like, you can glue your googly eyes to pieces of brown felt before attaching to the book.  Whatever you decide, arrange the eyes under the uni-brow and glue.
This goes faster if you have a furry assistant, I promise.  Trim your fur teeth to your liking, preferably with the pages showing through occasionally so you can tell it is a book.

Add a brown kid's belt to keep it from biting your fingers!

Always Grateful,
Katie

Thursday, January 26, 2012

Nutella goes with everything.

Bear with me as I figure this whole blog thing out.. I have a backlog of posts just itching to make the jump from my hard drive to the net.

When I discovered Nutella I was high school sophomore in French class. (French class also taught me that chevre, or goat cheese, was the savory gift from the gods. I think I retained more food interests than language from that class.) Since then I have tried to incorporate it into as many dishes as possible.

Since this is my first post, we'll keep it simple. I present to you- Nutella biscuits.

Of course it wasn't a new jar - I TOLD you, I use it on everything.  So here is what you need :
Nutella
Can o' flaky layer biscuits (or "Whoppin' biscuits" as my sister used to call them, because you "whop" the seam on the counter to open them)
Non-stick spray


So here is where it gets (not-so-very) complicated. You know how you get frustrated when trying to remove those darn flaky layers biscuits from the can and they don't come out in the appropriate portion sizes because the "layers" split in the middle? Well, let 'em. Put the first half of that finicky biscuit into your palm, drop a tablespoon of Nutella in the middle, and slap the other half of the biscuit on top, pinching the edges together. Easy-peasy!
Each lovely Nutella-dough nugget gets its own pre-sprayed cup in your muffin tin.


Bake according to the "whoppin' biscuit can" directions and these tasty buggers will be ready in no time. The plan was to get a picture of a biscuit cut open with the hazelnut lava oozing out, but the boys grew impatient and snarfed them up.


Always grateful-
Katie